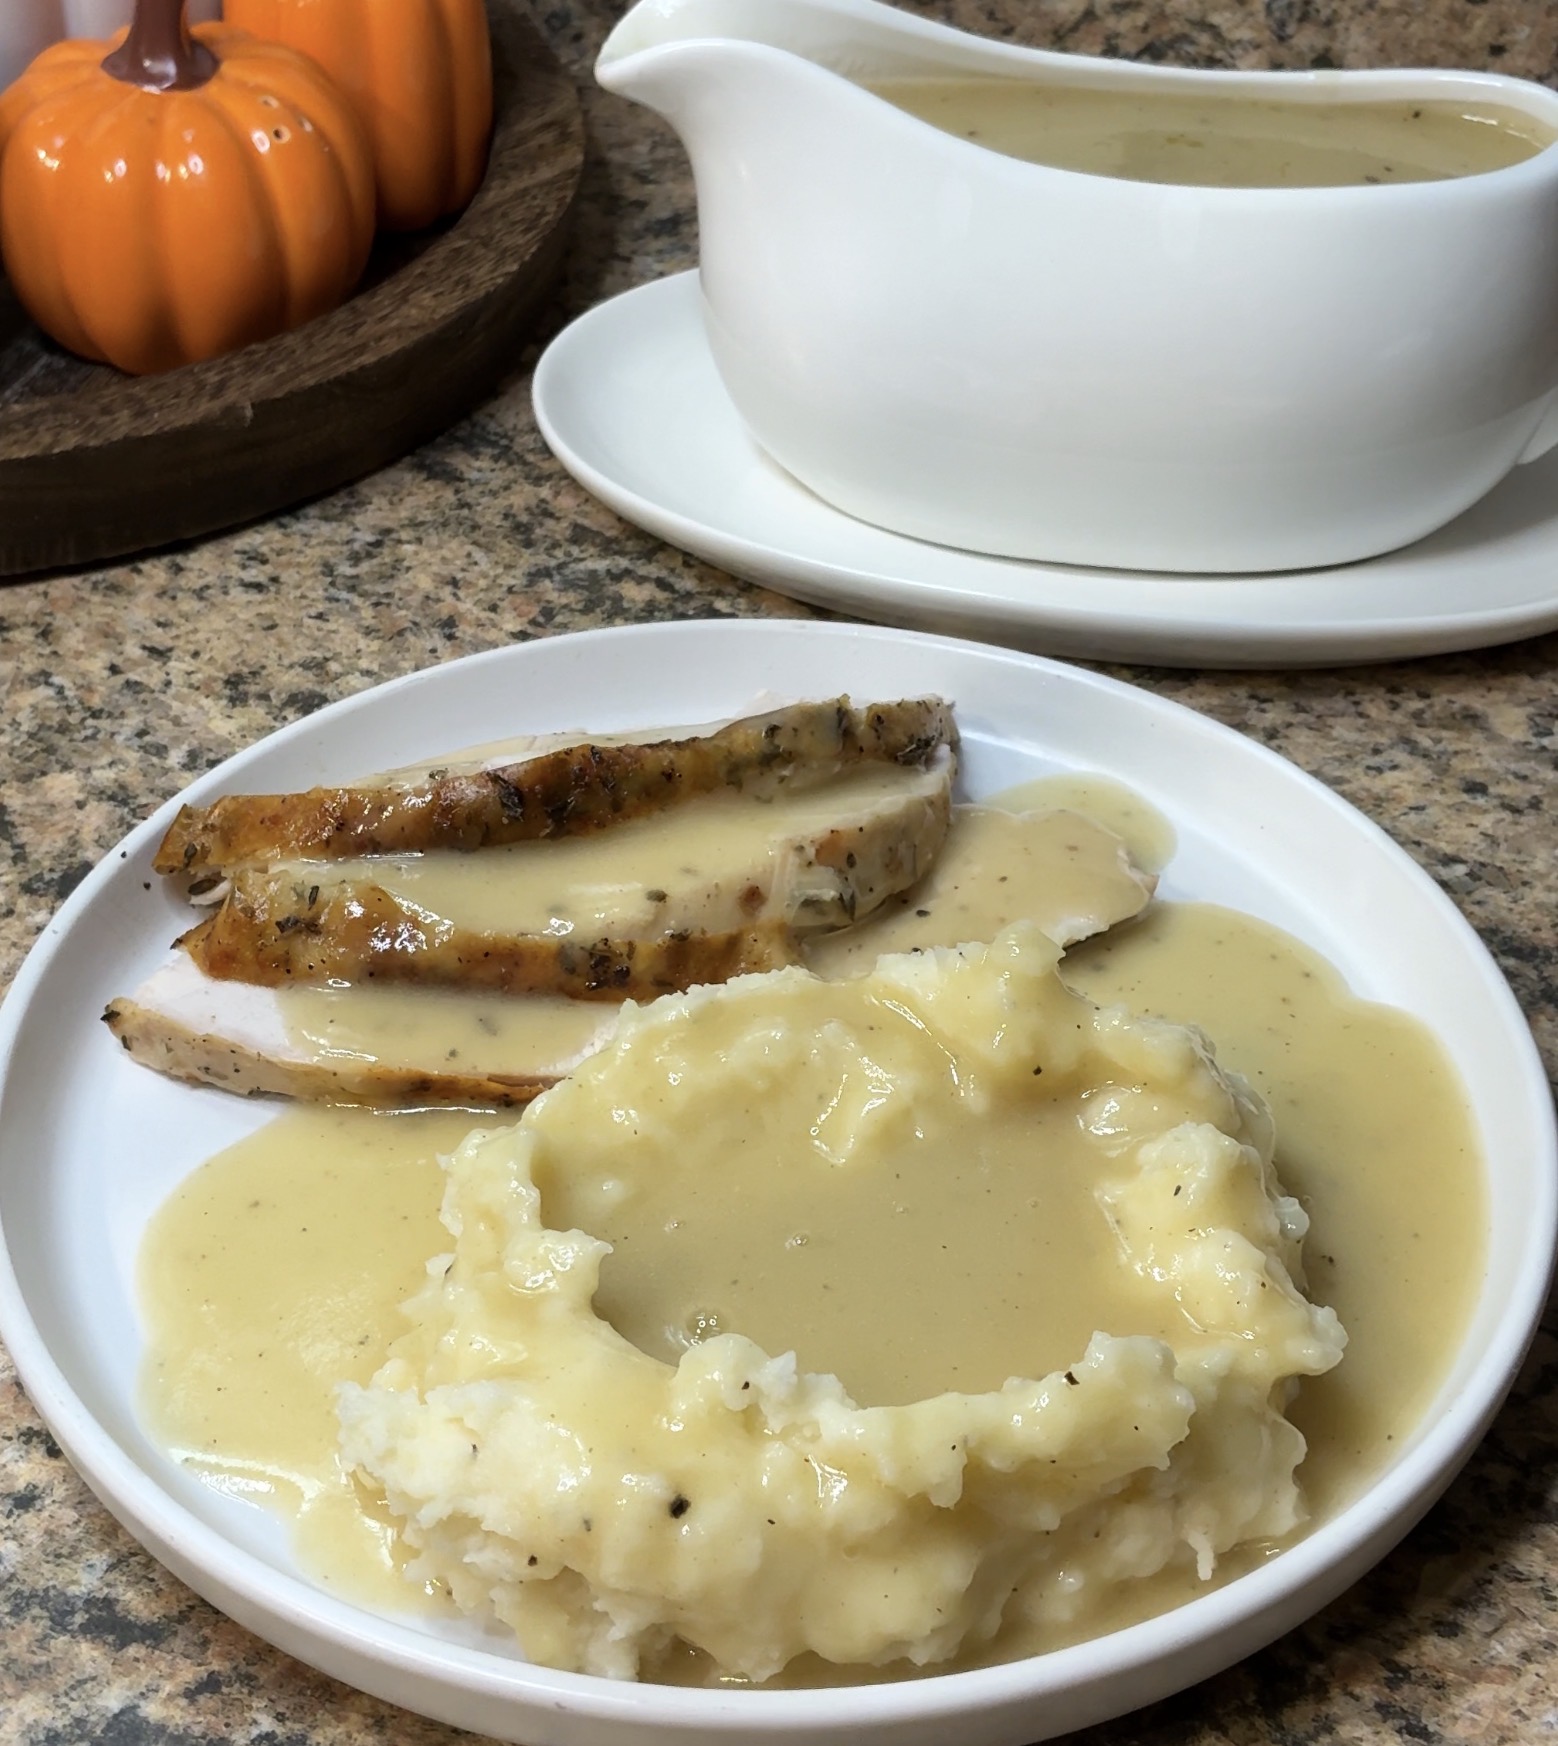
The Unbeatable Flavor of Homemade Turkey Gravy: An Easy 20-Minute Masterpiece
Imagine your holiday table: a perfectly roasted turkey, fluffy mashed potatoes, savory stuffing, and then, that rich, velvety stream of homemade turkey gravy cascading over everything. It’s the essential finishing touch that elevates a meal from delicious to unforgettable. Many assume making gravy from scratch is a complicated affair, reserved for seasoned chefs. But what if we told you that the most incredible, flavor-packed
turkey gravy can be yours in just about 20 minutes, using the very drippings from your roasted bird? This isn't just a recipe; it's a revelation, promising to transform your next feast with minimal effort and maximum reward.
Forget the bland, store-bought alternatives. The true magic of homemade gravy lies in harnessing the concentrated flavors developed during the turkey's roasting process. Those golden-brown bits and savory liquids at the bottom of your roasting pan are a treasure trove, ready to be transformed into a culinary masterpiece. This guide will walk you through creating a foolproof, deeply flavorful gravy that will have everyone asking for your secret – all in the time it takes your turkey to rest before carving.
Harnessing the Power of Pan Drippings: The Foundation of Flavor
The secret to an extraordinary
turkey gravy lies in what's left behind in the roasting pan. Those precious pan drippings – a flavorful blend of rendered fat, juices, and browned bits – are pure liquid gold. While some recipes call for simmering giblets (the neck, heart, and other organs) to create a stock, this particular recipe focuses on a quicker, equally delicious method, making giblets entirely optional. You can simply discard them if you prefer a streamlined approach.
Even if you only have a few tablespoons of drippings, they contain an immense amount of savory depth. The beauty of starting with these natural concentrates is that they imbue your gravy with the specific, delicious essence of your roasted turkey. If your turkey was seasoned with herbs, maple syrup, or garlic, those nuanced flavors will carry directly into your gravy, creating a harmonious and cohesive meal experience.
The first crucial step after removing your turkey from the oven is to prepare these drippings. While the pan is still warm, carefully pour the contents into a fat separator, if you have one. This handy tool makes separating the fat from the flavorful juices incredibly easy. If you don't have a separator, simply let the drippings sit for a few minutes; the fat will rise to the top. Skim off as much of the fat as you can, reserving about 2-3 tablespoons for your roux. The remaining liquid (the concentrated turkey stock) is what you'll use for the base of your gravy. Aim for roughly 2 cups of liquid total; if you have less turkey stock from the pan, supplement with high-quality chicken or turkey broth.
Your 20-Minute Gravy Masterclass: A Step-by-Step Guide
Making this homemade
turkey gravy is a testament to how simple yet impactful a few basic culinary techniques can be. You'll be amazed at how quickly a few humble ingredients transform into a luxurious sauce.
1. Crafting the Roux: The Thickening Base
A roux is the secret to a smooth, lump-free gravy. In a medium saucepan, melt the reserved 2-3 tablespoons of turkey fat (or unsalted butter if you don't have enough fat) over medium heat. Once shimmering, whisk in an equal amount of all-purpose flour (2-3 tablespoons). Whisk continuously for 1-2 minutes until a smooth paste forms and cooks, taking on a light golden color. This cooking time is essential to eliminate the raw flour taste. For an extra layer of flavor, you can stir in finely minced garlic or a pinch of garlic powder at this stage.
2. Gradually Adding the Liquid: The Key to Silkiness
Now comes the crucial part for a silky-smooth gravy: gradually adding your liquid. Ensure your turkey stock/broth is warm (you can microwave it briefly if needed). Warm liquid blends into the roux much more easily, preventing lumps. Slowly pour in about 1/2 cup of the warm liquid at a time, whisking vigorously after each addition until fully incorporated and smooth. Continue this process until all 2 cups of liquid have been added, creating a smooth, somewhat thick sauce. Whisking consistently is your best friend here!
3. Simmer, Adjust, and Season to Perfection
Once all the liquid is incorporated, bring the gravy to a gentle simmer over medium-low heat, stirring occasionally. It will thicken as it heats. Allow it to simmer for 5-7 minutes, giving the flavors a chance to meld and the gravy to reach your desired consistency.
*
Too thick? Whisk in a little more warm stock or broth until it reaches your preferred pourable consistency.
*
Too thin? Let it simmer for a few more minutes, allowing it to reduce and thicken naturally. If it's still too thin, you can create a slurry of 1 tablespoon cornstarch mixed with 1 tablespoon cold water, then whisk it into the simmering gravy until thickened.
Finally,
always taste and season last. Turkey drippings are often naturally salty, so adding salt too early can make your gravy overly seasoned. Add salt and freshly ground black pepper to taste. If you desire an ultra-smooth finish, you can pour the gravy through a fine-mesh sieve or strainer before serving.
For more in-depth advice on achieving that perfect texture and seasoning, check out our guide on
Foolproof Turkey Gravy: Skim, Stir, & Season for Rich Flavor.
Elevate Your Gravy: Customization and Serving Tips
One of the great joys of homemade
turkey gravy is its adaptability. While delicious on its own, you can easily customize it to suit your palate or complement your meal.
*
Herbal Infusion: For aromatic depth, stir in fresh, finely chopped herbs like rosemary, thyme, or sage during the last few minutes of simmering. A combination of these classic poultry herbs works beautifully.
*
Umami Boost: A dash of soy sauce, Worcestershire sauce, or even a tiny dab of miso paste can add incredible savory depth without overpowering the turkey flavor.
*
Rich & Creamy: For a more luxurious, creamy gravy, whisk in a tablespoon of heavy cream or half-and-half just before serving.
*
Wine or Sherry: A splash of dry white wine or dry sherry adds a lovely brightness and complexity. Add it when you're making the roux, allowing the alcohol to cook off before adding the stock.
*
Gluten-Free Option: Easily make this gravy gluten-free by swapping the all-purpose flour for a gluten-free all-purpose flour blend or using cornstarch as your thickening agent (create a slurry as described above).
Discover more creative ways to tailor your gravy in our article,
Master Delicious Turkey Gravy: Customize with Herbs, Wine, or Umami.
For serving, a simple trick to ensure your gravy stays wonderfully warm throughout the meal is to pre-warm your gravy boat. Fill it with hot (not boiling) water for a few minutes, then empty it just before pouring in your freshly made gravy.
Conclusion: The Ultimate Holiday Companion
This easy, 20-minute homemade
turkey gravy recipe is more than just a condiment; it's a testament to the idea that the best flavors often come from the simplest, freshest ingredients. By harnessing the rich essence of your turkey's pan drippings, you create a sauce that perfectly complements every element of your holiday spread. Forget the stress and enjoy the satisfaction of serving a truly unforgettable gravy that's smooth, flavorful, and incredibly simple to make. Your guests (and your taste buds) will thank you!